VORMAHELP CENTER PDF guide
VORMA PRO/User guide

DOCUMENTATION / v1.28.7

Learn VORMA.
Build with confidence.

A practical guide to designing, updating, editing and exporting VORMA systems inside Autodesk Revit.

21 ribbon commands26 pattern families4 design studios
01

GET STARTED

From installation to a checked result.

01

Install and restart Revit

Run the official VORMA installer for your Revit version, close Revit during installation, then reopen it. The VORMA PRO panel appears on the Add-Ins ribbon.

02

Open License Center

VORMA PRO v2 includes a full 15-day trial, including Parametric and Responsive. Upgrading preserves your original trial start. Paste a paid Creem license key to continue after the trial. License Center remains available even when protected commands are locked.

03

Choose a creation workflow

Use Generate Pattern for Geometry, Landscape or Responsive systems. Use the Parametric menu for wall slats, perimeter slats or ceiling baffles.

04

Pick a host and preview

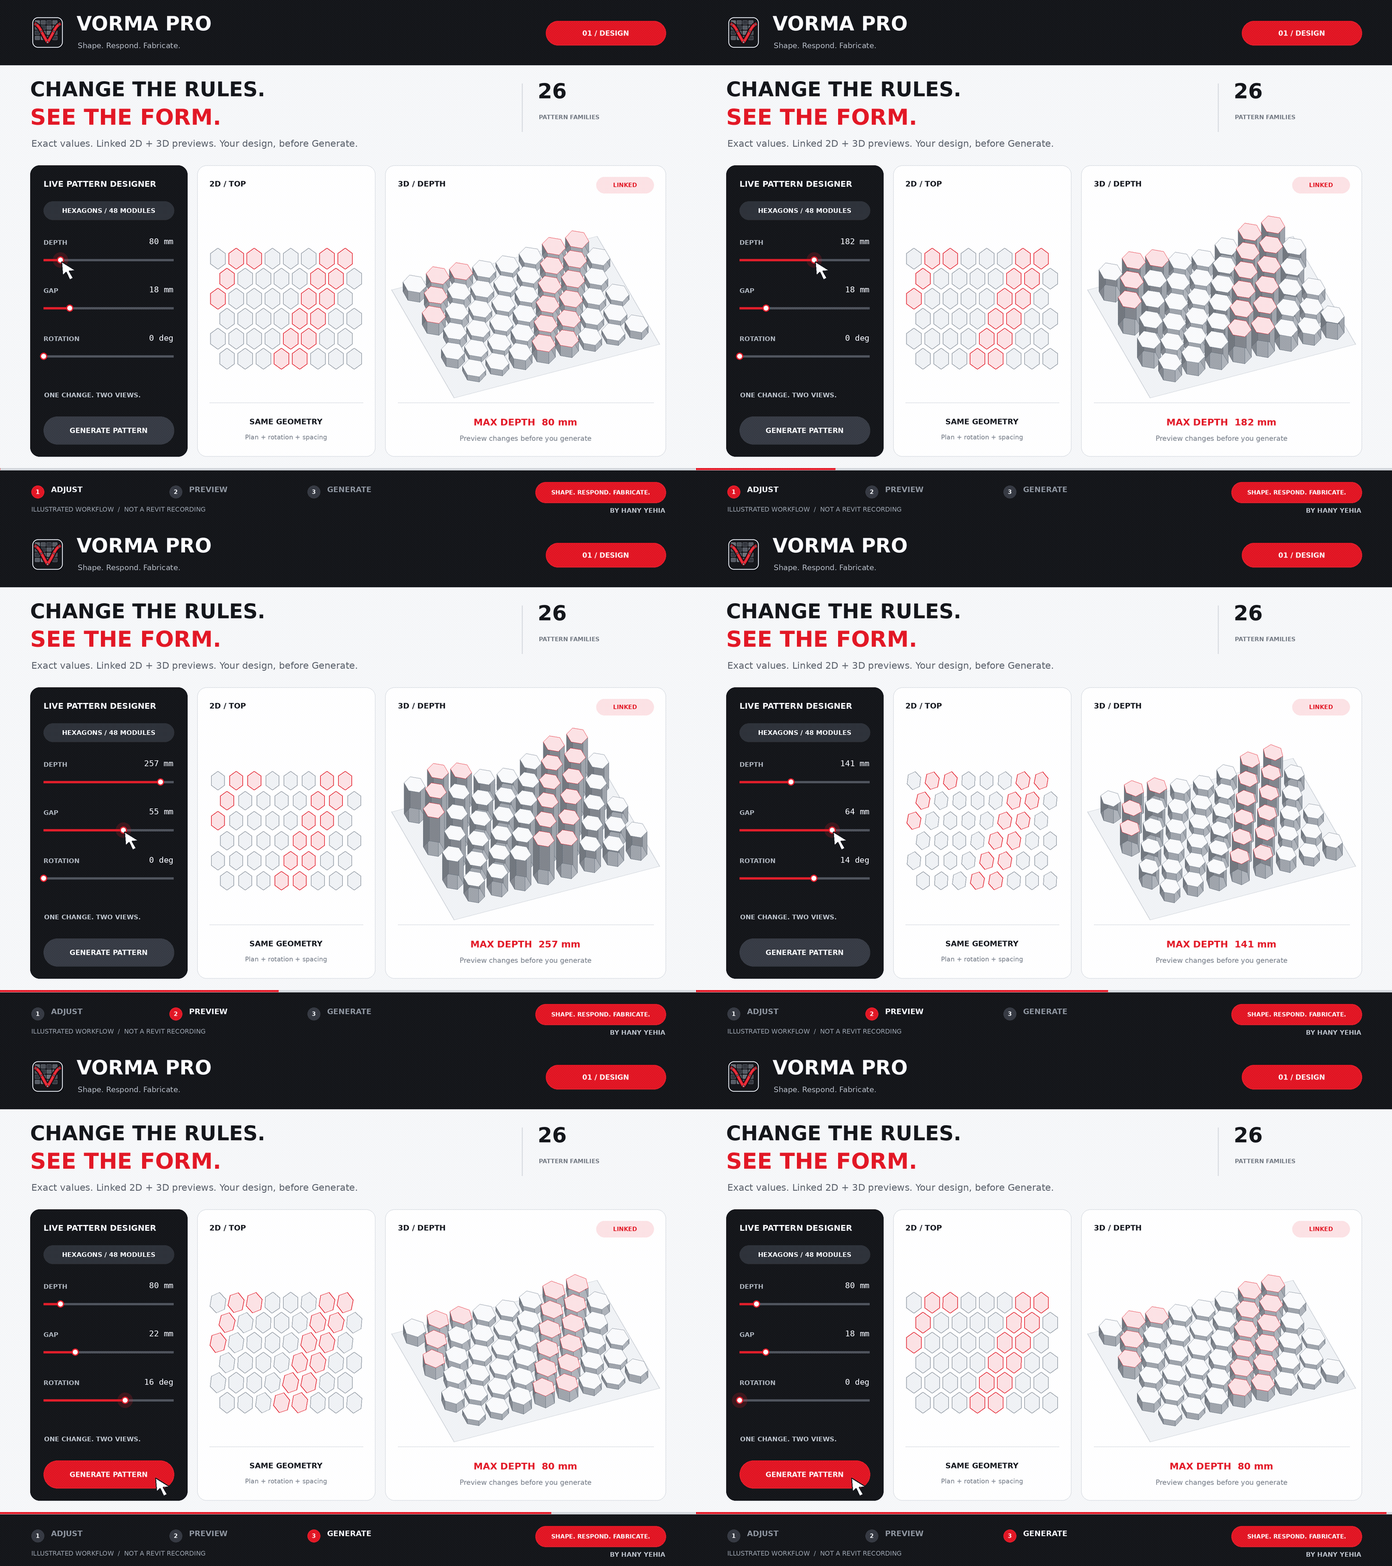
Pick the required Revit face, set the controls, then inspect the 2D field and orbitable 3D response before generating model geometry.

05

Edit through VORMA

Use Edit, Update, boundary tools and material tools on a surviving VORMA element. Stable module identities preserve supported local edits when the host changes.

06

Verify before fabrication

Export DXF, SVG and CSV only after checking geometry in Revit. Confirm scale, contours, materials, quantities, kerf, stock breaks and joints with the fabricator.

Work on a copied Revit project while learning.

Generate, update, remove and export only after you understand which complete VORMA generation the selected element belongs to.

02

HOW VORMA THINKS

Six concepts behind every workflow.

Generation

Every VORMA system has a Generation ID. Select one surviving member to edit, update, remove or export the complete generation.

Host

The picked Revit face defines the system coordinate frame and boundary. Keep the host available if you want associative updates.

Stable identity

VORMA tracks modules by deterministic keys rather than temporary selection order. Matching keys allow supported edits to survive regeneration.

Explicit update

Geometry, Landscape and most Responsive systems use Update From Host. Parametric systems can also use a license-gated automatic updater after Revit commits a source edit.

Individual vs batched

Individual elements can be selected, moved, painted or deleted separately. Batched output is lighter for large fields and can be converted with Make Editable.

Design geometry

VORMA produces architectural design and coordination geometry. It does not design structure, fixings, fire performance, waterproofing, acoustics or machine tooling.

03

CHOOSE A WORKFLOW

Four design studios, one Revit model.

01

Geometry Studio

Create solid modules or perforated screens on a picked face using regular, random, gradient, cellular and wave-based pattern families.

OUTPUTSSolid ModulesPerforated Screen
  • Columns and rows
  • Gap ratio
  • Depth and surface offset
  • Density and jitter
  • Phase, wave and seed
  • Individual editing and material
02

Landscape Studio

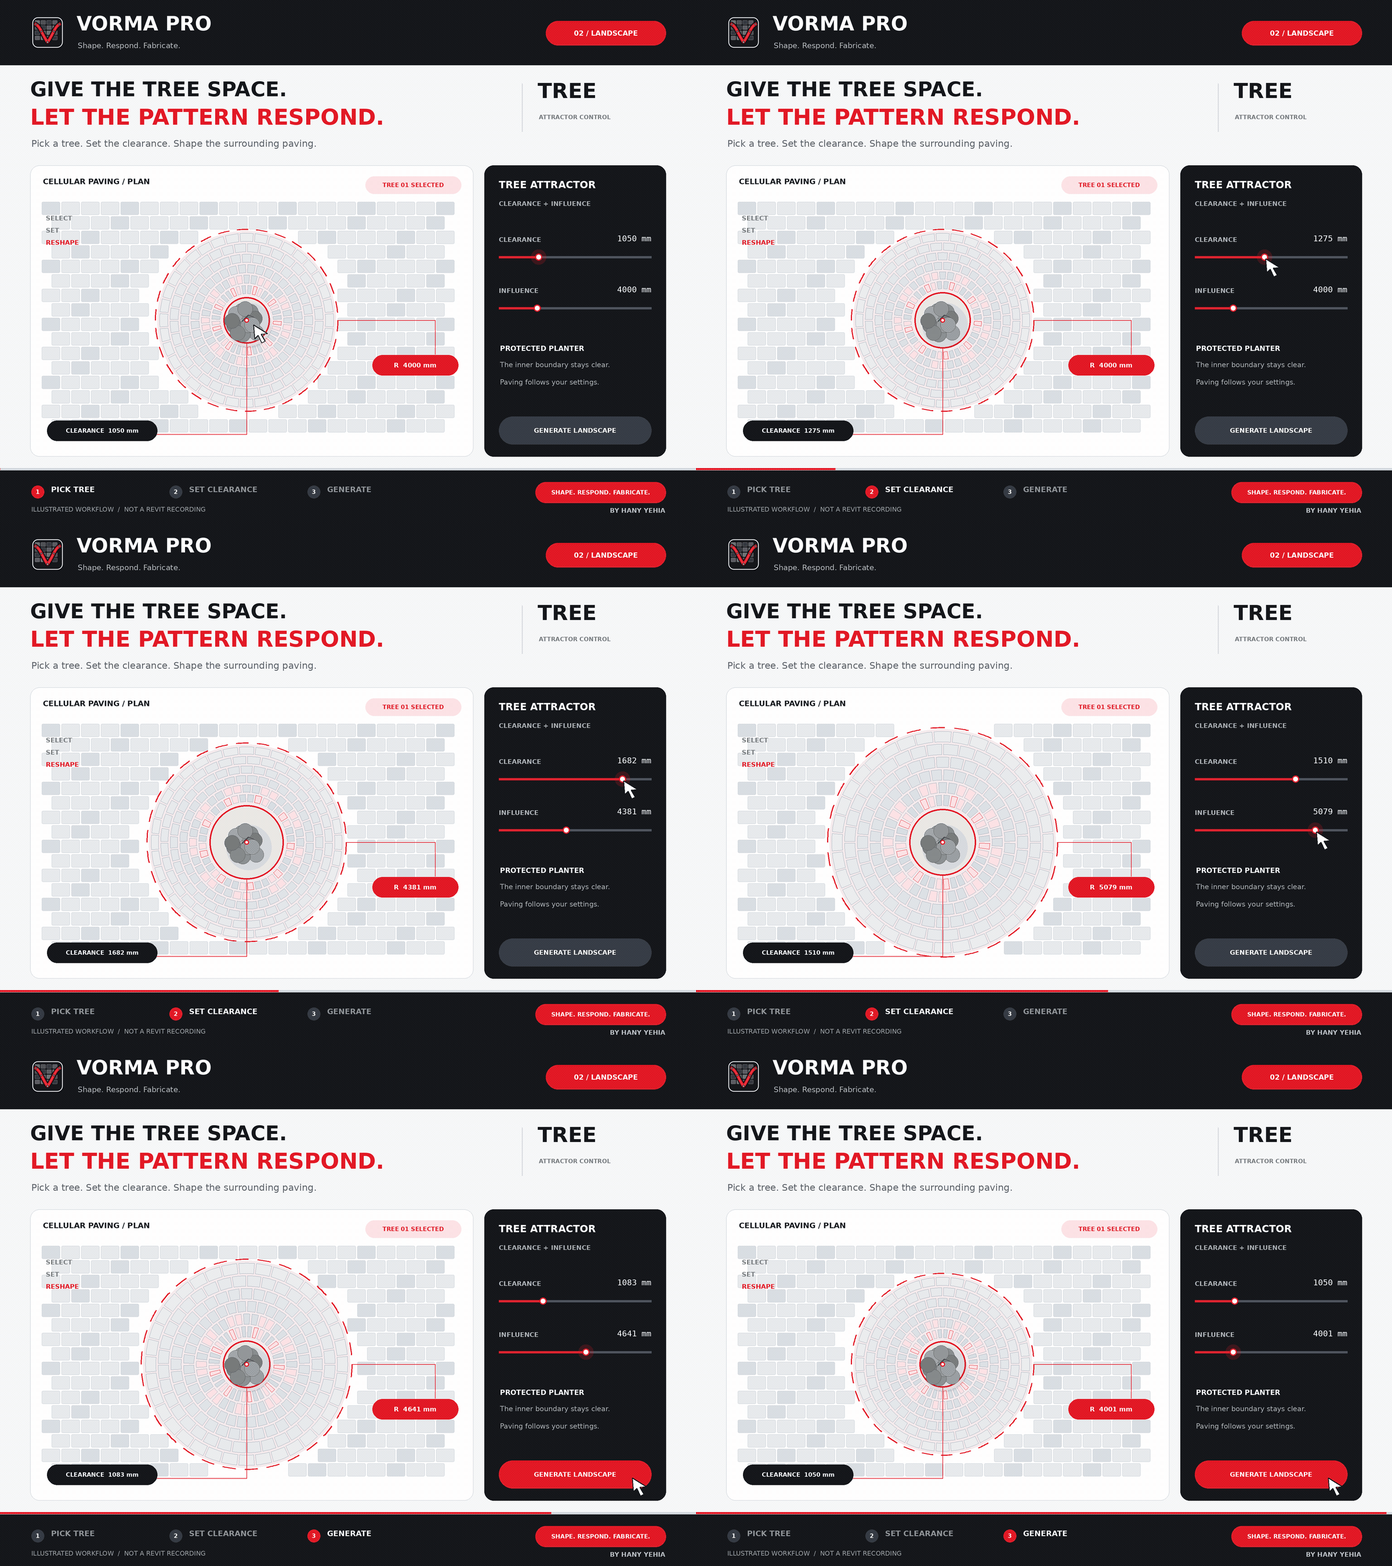
Generate paving on suitable floor, terrain or horizontal faces, with optional tree-driven clearance, warping or cellular transitions.

OUTPUTSLandscape DirectShapesNative Revit Floors on compatible flat hosts
  • Six landscape pattern families
  • Tree family selection
  • Clearance and influence radius
  • Warp strength or ring count
  • Depth, offset and material
  • Editable boundaries
03

Responsive Geometry Studio

Drive scale, rotation, depth and offset from a movable point, a line, a picked Model Curve or the active Revit Sun Path.

OUTPUTSVoid OpeningsSolid ModulesPanel FramesFamily Modules
  • Point, line, curve or Sun driver
  • Seven profile shapes plus custom profile
  • Profile morphing
  • Linear, Smooth or Sharp response
  • Near/far inversion
  • 2D field and 3D response preview
04

Parametric Slats and Baffles

Create depth-responsive wall slats, closed-perimeter slat systems and ceiling baffles from sine waves or selected Revit Model Curves.
OUTPUTSIndividual Generic Model DirectShape ribsDedicated flat DXF and parts CSV for supported systems
  • Vertical, horizontal or legacy custom-angle layout
  • Thickness, pitch, depth and amplitude
  • Sine or picked-curve driver
  • Door and Window cuts
  • Slat rotation and materials
  • 2D layout and orbitable 3D preview
VORMA live Pattern Designer preview
Pattern Designer
A responsive façade following a Revit spline
Responsive Spline
Landscape paving responding to tree attractors
Tree Attractor
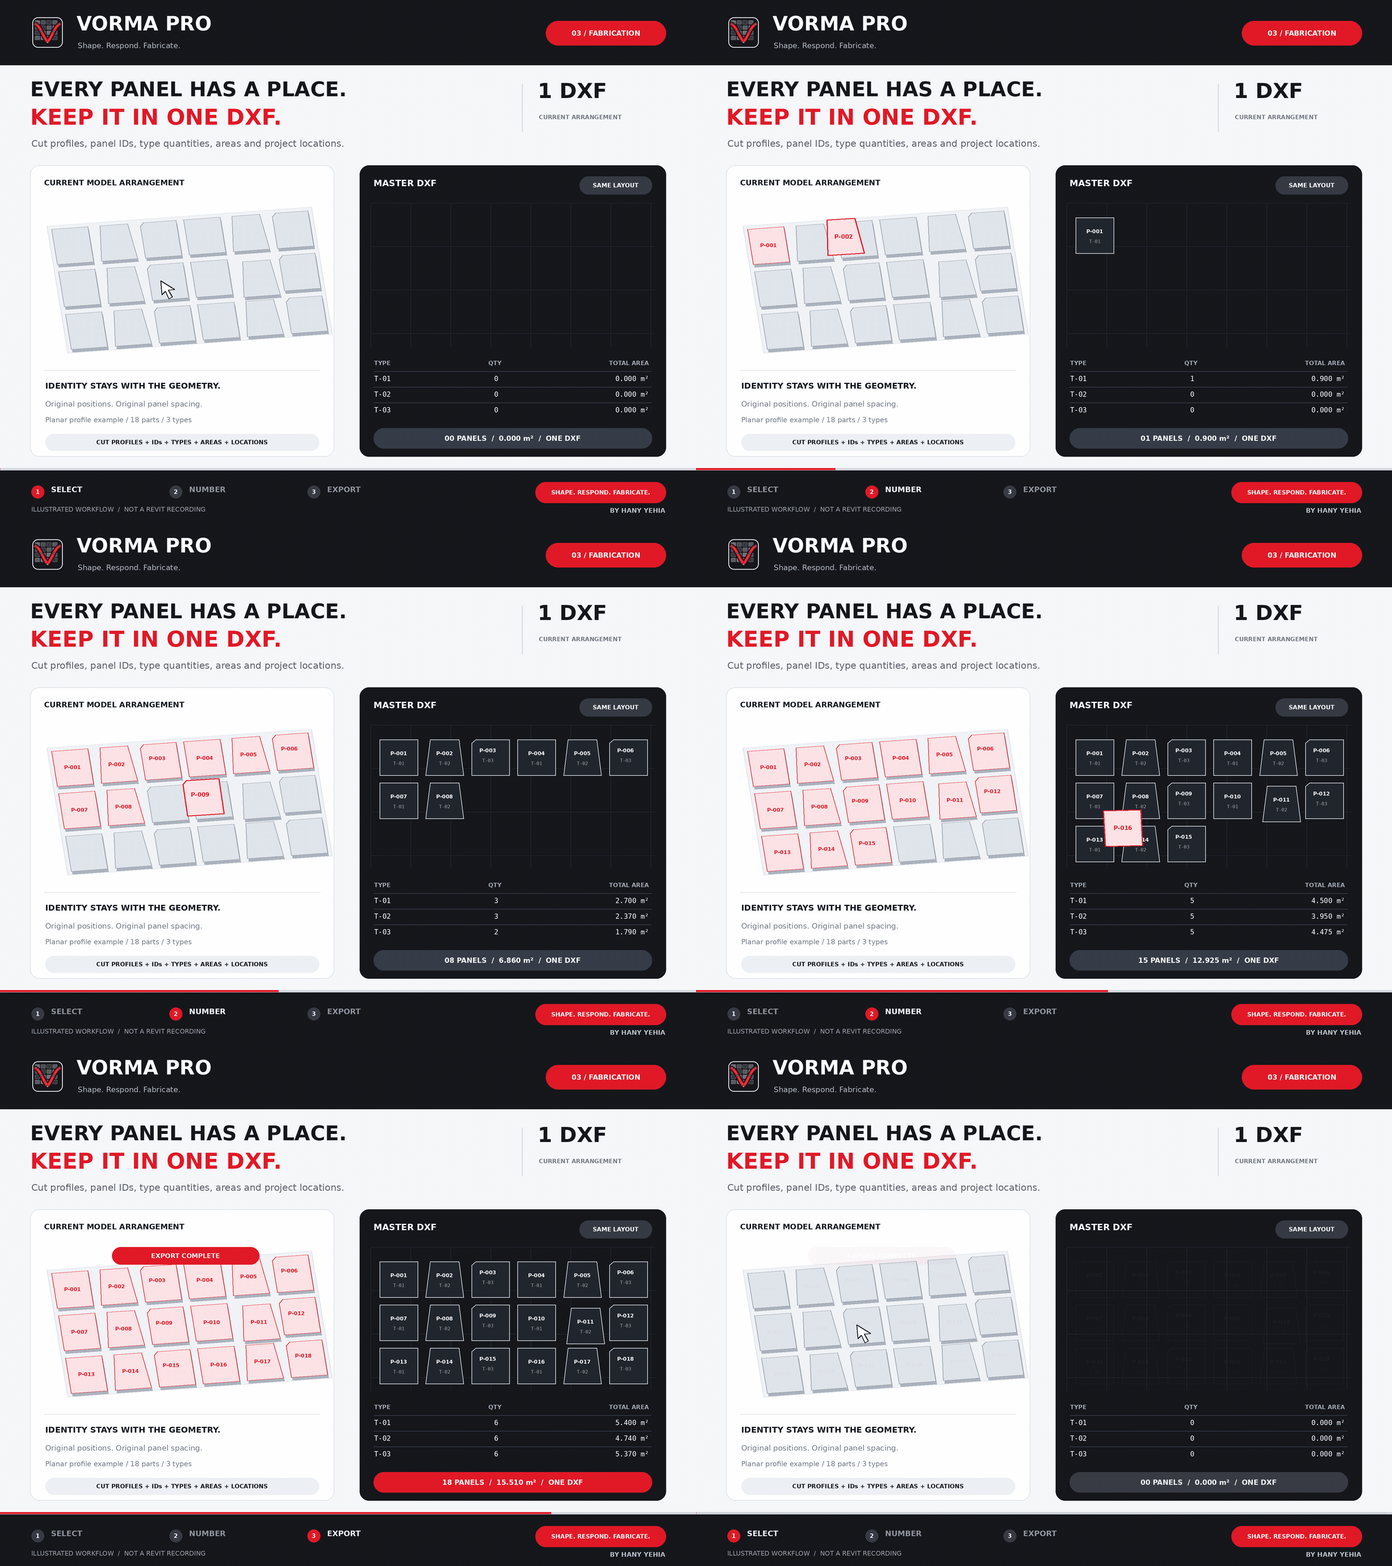
VORMA master fabrication DXF workflow
Master DXF
04

RIBBON REFERENCE

Every command, explained.

Open a command to see its purpose, workflow, result and important limits.

Start and license1

ALWAYS AVAILABLE

License Center

Start the local trial, activate a paid key, refresh entitlement, deactivate this computer or copy the Computer ID for support.

RIBBON PATHVORMA PRO > License Center
Use it when

Use before the first protected command, after purchasing, when moving a seat to another computer or when access needs refreshing.

Workflow
  1. 1Open License Center from the VORMA PRO ribbon.
  2. 2For paid access, paste the Creem license key and choose Activate on this computer.
  3. 3Use Refresh License after renewal or entitlement changes.
  4. 4Deactivate before replacing a computer when possible.
Result

The status card shows trial or subscription access and the current computer activation.

Check before you continue
  • The three-day trial starts on first use and is bound to that Windows computer.
  • Paid plans allow up to two activated computers.
  • Send the Computer ID to support@vorma.me if activation cannot be resolved.

Create geometry2

PRO COMMAND

Generate Pattern

Open Geometry, Landscape or Responsive Geometry Studio and generate a complete VORMA system on a picked Revit face.

RIBBON PATHVORMA PRO > Generate Pattern
Use it when

Use for the first creation of façade modules, perforated screens, landscape paving or responsive geometry.

Workflow
  1. 1Choose Generate Pattern, then pick a suitable face in the active Revit model.
  2. 2Select Geometry, Landscape or Responsive and choose an output mode.
  3. 3Choose a pattern family and set dimensions, behaviour, material and editing mode.
  4. 4Inspect the 2D and 3D previews, then choose Generate.
Result

A tracked Revit generation is created with saved settings, host reference, material and stable module identities.

Check before you continue
  • Columns x rows cannot exceed 40,000.
  • Perforated Screen is limited to 2,500 cells; Responsive Family Modules to 2,000 cells.
  • Individual modeled pieces are limited to 5,000 and can increase file size.
PRO COMMAND

Custom Module Array

Array a rigid source Model-in-Place, Family, Generic Model or DirectShape across a selected surface.

RIBBON PATHVORMA PRO > Custom Module Array
Use it when

Use when the module already exists as Revit geometry and must remain a repeated rigid form rather than a generated profile.

Workflow
  1. 1Pick the source element, then pick the host face.
  2. 2Choose an automatic rows/columns grid or manual points on the surface.
  3. 3Set surface offset and rotation around the local normal.
  4. 4Generate, then move, delete or paint independent copies as required.
Result

Independent Generic Model DirectShape copies receive Marks, Comments and a shared generation identity.

Check before you continue
  • Automatic arrays are limited to 2,000 copies.
  • Points outside trimmed host regions are skipped.
  • The source must expose usable solid or mesh geometry.

Update and edit patterns7

PRO COMMAND

Update From Host

Rebuild a Geometry, Landscape or Responsive generation from its current host and saved sources.

RIBBON PATHVORMA PRO > Update From Host
Use it when

Use after resizing or reshaping the host, moving responsive controls, editing a selected Model Curve or changing tree locations.

Workflow
  1. 1Choose the command and select one surviving element from the generation.
  2. 2Review the update summary after VORMA rebuilds the system.
  3. 3Check preserved deletions, moves, rotations, boundaries and materials in the model.
Result

Matching modules remap to the updated host while supported overrides are reapplied.

Check before you continue
  • A deleted or invalid source may require Edit / Regenerate and repicking.
  • Topology changes can create new keys; unmatched local edits cannot be transferred safely.
  • Worksharing ownership, pinned elements or document restrictions can block changes.
PRO COMMAND

Edit / Regenerate

Reopen the saved studio settings for an existing generation, change them and regenerate.

RIBBON PATHVORMA PRO > Edit / Regenerate
Use it when

Use to change pattern family, resolution, depth, responsive driver, landscape attractors, material or output settings.

Workflow
  1. 1Select one surviving member of the required generation.
  2. 2Adjust settings in the studio and repick sources when prompted.
  3. 3Preview the revised result and regenerate.
Result

The generation is replaced with the revised design while compatible stable-key overrides are preserved.

Check before you continue
  • Large changes to rows, columns or pattern topology can intentionally replace module identities.
  • Cancelling a repick leaves the existing generation unchanged.
PRO COMMAND

Edit Module Boundary

Edit the 2D boundary of one individual Solid or Void module; Solid modules also support local 3D relief and extrusion.

RIBBON PATHVORMA PRO > Edit Module Boundary
Use it when

Use for a custom panel edge, a corrected opening, a local relief feature or a one-off module variation that should survive host updates.

Workflow
  1. 1Pick an individual editable Solid or Void DirectShape.
  2. 2Drag vertices or edit exact U/V values; add or remove midpoints as needed.
  3. 3For Solid output, adjust per-vertex Z offsets and local extrusion in the 3D tab.
  4. 4Validate and apply the boundary.
Result

A saved relative geometry override is attached to that module identity and reapplied on compatible updates.

Check before you continue
  • Void geometry remains planar to protect reliable Boolean openings.
  • Self-intersecting or Revit-invalid geometry is rejected.
  • This command does not edit batched elements; run Make Editable first.
PRO COMMAND

Apply Module Edit

Copy one edited Solid or Void module's boundary, openings, relief and extrusion to compatible modules in the same generation.

RIBBON PATHVORMA PRO > Apply Module Edit
Use it when

Use when a custom module variation should be repeated across several geometrically compatible cells.

Workflow
  1. 1Pick the already edited source module.
  2. 2Select compatible target modules from the same generation.
  3. 3Confirm the transfer and review applied versus skipped targets.
Result

Each valid target receives a mapped edit while its own move, rotation and painted material overrides remain.

Check before you continue
  • Targets with incompatible output, topology, vertex count or mapping error are skipped.
  • Always inspect transferred relief on curved hosts.
PRO COMMAND

Make Editable

Convert a batched Solid, Void or Landscape generation into one independently selectable Revit element per module or tile.

RIBBON PATHVORMA PRO > Make Editable
Use it when

Use before local moving, deletion, painting or boundary editing when a generation was created in optimized batch mode.

Workflow
  1. 1Select any element from the batched generation.
  2. 2Run Make Editable and confirm conversion.
  3. 3Select and modify individual modules with supported Revit and VORMA tools.
Result

The design keeps its Generation ID while each module becomes independently selectable.

Check before you continue
  • Individual elements increase model size and regeneration cost.
  • The modeled-piece safety limit is 5,000.
PRO COMMAND

Remove Pattern

Delete the complete Geometry, Landscape, Responsive or Custom Module Array generation selected through one member.

RIBBON PATHVORMA PRO > Remove Pattern
Use it when

Use when the entire generated system is no longer required.

Workflow
  1. 1Select one element carrying the required VORMA generation metadata.
  2. 2Run Remove Pattern and confirm the operation.
  3. 3Use Revit Undo immediately if the wrong generation was removed.
Result

All surviving generated members in the selected generation are removed.

Check before you continue
  • Removal targets the complete generation, not only the picked module.
  • User-owned host geometry is not intentionally removed.
PRO COMMAND

Convert Panels

Convert selected VORMA panels or Parametric slats and baffles into the chosen Revit output.

RIBBON PATHVORMA PRO > Convert Panels
Use it when

Use when generated pieces need to become independent Revit elements for downstream editing and documentation.

Workflow
  1. 1Select the VORMA panels or pick a rib from the required Parametric system.
  2. 2Open Convert Panels and choose the selection scope, destination and available native type.
  3. 3Run conversion and review the report; inspect the converted elements in the model.
Result

Successfully verified pieces are converted. A piece that fails conversion is retained and listed in the report.

Check before you continue
  • Native conversion depends on the source geometry and selected destination.
  • Converted elements no longer follow the original VORMA generation.
  • Use the report to select any pieces that were not converted.

Materials2

PRO COMMAND

Paint Material

Apply an existing or newly named Revit material to selected generated modules or Custom Module Array copies.

RIBBON PATHVORMA PRO > Paint Material
Use it when

Use for controlled material overrides on selected pieces.

Workflow
  1. 1Preselect or pick generated elements.
  2. 2Choose an existing Revit material or enter a new material name.
  3. 3Apply and review the painted faces in a suitable visual style.
Result

Real Revit material assignments are stored on the selected elements and can be preserved through associative updates.

Check before you continue
  • Edit the appearance asset later through Revit Manage > Materials.
  • Native face Paint can be reported separately from Parametric stock material.
PRO COMMAND

Material / Color Randomizer

Distribute a repeatable palette across individual modules using balanced shuffle or pure seeded random assignment.

RIBBON PATHVORMA PRO > Material / Color Randomizer
Use it when

Use for controlled façade, paving or module color variation across a full generation or a selected set.

Workflow
  1. 1Select starting elements and choose whether to expand to their complete generations.
  2. 2Choose a preset palette, custom HEX colors or existing Revit materials.
  3. 3Choose Balanced shuffle or Pure seeded random and set the seed.
  4. 4Review the live preview, then apply.
Result

VORMA creates or reuses real Revit materials and assigns them deterministically by stable module key.

Check before you continue
  • Choose at least two palette entries; up to 64 are supported.
  • The same palette, method and seed reproduce the same distribution.
  • Custom HEX colors create named VORMA Random materials.

Fabrication1

PRO COMMAND

Fabrication Pro DXF + Types

Read current generated panel geometry, rationalize manufacturing types, create Revit schedules and export consolidated DXF, SVG and CSV data.

RIBBON PATHVORMA PRO > Fabrication Pro DXF + Types
Use it when

Use after Geometry, Landscape or Responsive panel design is stable and must be numbered, grouped or prepared for coordination with a fabricator.

Workflow
  1. 1Select one or more supported VORMA elements and choose whether to expand each complete generation.
  2. 2Choose current arrangement, master DXF, master SVG or the complete DXF + SVG + CSV set.
  3. 3Set stock size, margin, spacing, kerf metadata, nesting rotation and labels.
  4. 4Set type tolerances, representative geometry and schedule options, then export.
  5. 5Open the files independently and verify at least one known dimension at 1:1 mm.
Result

Consolidated drawings, part/type data, utilization metrics and optional Type Quantities and Part Register schedules are produced.

Check before you continue
  • Current-arrangement export requires compatible planar geometry and a common drawing plane.
  • Curved or nonparallel selections may be blocked or need a documented flattened workflow.
  • Output is coordination data, not approved machine-ready CAM.

Parametric slats and baffles8

PRO COMMAND

Wall Slats

Generate vertical, horizontal or legacy custom-angle ribs on one vertical planar wall face.

RIBBON PATHVORMA PRO > Parametric > Wall Slats
Use it when

Use for a slatted wall, sunscreen or feature surface driven by a sine wave or up to 16 Revit Model Lines, Arcs or Splines.

Workflow
  1. 1Pick a vertical planar wall face.
  2. 2Optionally pick hosted Doors and Windows for associative cuts.
  3. 3Set the panel area, rib dimensions, wave driver, direction, rotation, clearance and material.
  4. 4Inspect 2D and 3D preview, then Generate.
Result

Individual tracked Generic Model DirectShape ribs are created and can update from the host, curves and selected openings.

Check before you continue
  • One-face Wall Slats does not accept a curved wall face.
  • Pitch must be greater than thickness.
  • Selected openings must be hosted by the picked wall.
PRO COMMAND

Perimeter Wall Slats

Wrap one globally numbered slat system around 3-32 connected exterior wall faces, including supported cylindrical wall fillets.

RIBBON PATHVORMA PRO > Parametric > Perimeter Wall Slats
Use it when

Use for continuous building-perimeter vertical stations or horizontal rows that must not restart at every wall corner.

Workflow
  1. 1Select each connected exterior wall face once, in any order, then Finish.
  2. 2Optionally link hosted Doors and Windows from the selected walls.
  3. 3Choose Vertical or Horizontal, set the global wave and rib controls, then preview the unwrapped 2D elevation and installed 3D wrap.
  4. 4Generate and check every corner, seam and opening.
Result

The perimeter is ordered, unwrapped by true line/arc length and generated as one associative system.

Check before you continue
  • Hosts must be native exterior Wall faces forming one closed non-branching loop.
  • Horizontal rows require a common base within 1 mm and common height within 5 mm, and use 0 degree slat rotation.
  • Horizontal perimeter rows are bent multi-wall parts and cannot use flat slat DXF export.
PRO COMMAND

Ceiling Baffles

Generate wave-driven baffles below a horizontal underside face of a ceiling, floor or roof.

RIBBON PATHVORMA PRO > Parametric > Ceiling Baffles
Use it when

Use for acoustic, visual or lighting baffle studies on a flat horizontal underside.

Workflow
  1. 1Pick the horizontal underside face.
  2. 2Set panel area, thickness, pitch, minimum depth, amplitude, driver and material.
  3. 3Check in preview that baffles extend downward, then Generate.
Result

Individual downward-extending baffles are created and linked to the selected face and curve drivers.

Check before you continue
  • Pick the underside, not the top face.
  • Ceiling Baffles use the supported vertical rib direction.
  • Acoustic, fire and suspension design require separate engineering.
PRO COMMAND

Edit / Repick

Edit Parametric settings or repick the host, Model Curves and selected Door/Window cuts.

RIBBON PATHVORMA PRO > Parametric > Edit / Repick
Use it when

Use when a saved source was deleted or changed, when opening links need correction or when the slat design parameters must change.

Workflow
  1. 1Select one surviving rib from the system.
  2. 2Change settings and choose repick actions as needed.
  3. 3Preview, decide whether to reset preserved manual edits, then regenerate.
Result

The same Parametric generation is rebuilt from the revised inputs.

Check before you continue
  • Reset intentionally recreates deleted ribs and removes saved moves, boundary edits and material overrides.
  • If every rib was deleted, use Revit Undo to recover a selectable member first.
PRO COMMAND

Update from Host / Splines

Manually refresh an existing Parametric system from its current host, curves, Doors and Windows.

RIBBON PATHVORMA PRO > Parametric > Update from Host / Splines
Use it when

Use after a source edit when automatic update is disabled, blocked by worksharing or needs a deliberate manual check.

Workflow
  1. 1Select one surviving rib.
  2. 2Run Update from Host / Splines.
  3. 3Review the update summary and inspect preserved local changes.
Result

Ribs are regenerated once from the effective inputs, with supported translations, deletions, profile edits and materials reapplied.

Check before you continue
  • Arbitrary manual rib rotations are not preserved.
  • Duplicate copied rib identities block update until the extra copies are removed.
  • A missing source leaves old geometry in place and asks for repicking.
PRO COMMAND

Slat Materials

Assign a real existing or newly named Revit stock material to selected ribs.

RIBBON PATHVORMA PRO > Parametric > Slat Materials
Use it when

Use when individual rib stock groups must differ and remain identifiable in the parts CSV.

Workflow
  1. 1Select one or more Parametric ribs.
  2. 2Choose an existing Revit material or type a new name.
  3. 3Apply and check the resulting material in Revit.
Result

The stock material is stored per rib and preserved through compatible updates.

Check before you continue
  • A native Revit face-paint finish is separate from the stock material and is reported separately.
  • Every rib needs a stock material before fabrication export.
PRO COMMAND

Export Slats DXF + CSV

Export the current supported Parametric generation as nominal full-size flat cut profiles and a one-row-per-rib parts register.

RIBBON PATHVORMA PRO > Parametric > Export Slats DXF + CSV
Use it when

Use for planar rib coordination after boundaries, materials and current generation membership have been checked.

Workflow
  1. 1Pick one surviving rib from the required system.
  2. 2Choose the DXF filename and confirm replacement of any matching CSV.
  3. 3Open the DXF in the intended CAD/CAM software and verify a known 1:1 mm dimension.
  4. 4Reconcile numbers, quantities, materials and thicknesses against the CSV and Revit model.
Result

A CUT-layer DXF and matching Parts CSV are written as one staged file set; manually deleted ribs are excluded.

Check before you continue
  • Horizontal perimeter systems are blocked because each row bends through multiple walls, corners and fillets.
  • The flat catalogue is not stock nesting and applies no kerf, joints, fixing holes or tool compensation.
  • Duplicate identities or externally altered invalid ribs must be resolved before export.
PRO COMMAND

Remove Parametric System

Remove the complete selected slat or baffle generation and its Parametric data record.

RIBBON PATHVORMA PRO > Parametric > Remove Parametric System
Use it when

Use when the entire Wall Slat, Perimeter Slat or Ceiling Baffle system is no longer needed.

Workflow
  1. 1Select one surviving rib.
  2. 2Run Remove Parametric System and confirm.
  3. 3Use Revit Undo immediately if the wrong system was selected.
Result

Generated ribs and the generation record are removed.

Check before you continue
  • The original host, selected Doors/Windows and user-drawn Model Curves are not intentionally deleted.
  • Removal affects the complete generation, including tracked copies.
05

PATTERN CATALOGUE

Twenty-six starting systems.

Pattern families define the initial geometric field. Output mode, host shape, dimensions and later editing determine the final Revit result.

Geometry patterns

01

Full panels

A complete regular grid; the clearest base pattern for solid panelization.

02

Checkerboard

Alternating occupied cells for open/solid rhythm studies.

03

Brick courses

Offset horizontal courses with a masonry-like stagger.

04

Diamonds

Rotated quadrilateral modules for faceted fields.

05

Triangles

Triangulated cells suited to directional panel studies.

06

Hexagons

Offset six-sided cells for honeycomb panel fields.

07

Circular discs

Circular modules or repeated opening logic.

08

Scales / shingles

Overlapping-looking offset modules for layered surface rhythm.

09

Diagrid strips

Crossing diagonal bands for exoskeleton or screen studies.

10

Vertical fins

Repeated narrow vertical modules.

11

Horizontal louvers

Repeated narrow horizontal modules.

12

Wave bands

Continuous-looking bands controlled by wave settings.

13

Random pixels

Seeded cell omission controlled by Density.

14

Gradient pixels

A directional density field controlled by phases and behaviour settings.

15

Islamic eight-point stars

Eight-point star modules for geometric screen development.

16

Voronoi cells

Seeded irregular cellular polygons.

17

Parametric waves

Wave-modulated modules controlled by amplitude, frequency and angle.

18

Attractor perforations

The required family for Responsive Geometry drivers and profile responses.

19

Honeycomb gradient

Hexagonal modules with a graded field response.

20

Moire ribbons

Layered ribbon logic for interference and depth studies.

Landscape patterns

01

Ashlar paving

Staggered rectangular paving courses.

02

Basket weave

Alternating paired units with woven orientation.

03

Herringbone

Interlocking angled paving units.

04

Interlocking pavers

Interlocking modular paving field.

05

Cobblestones

Seeded irregular paving suitable for looser landscape texture.

06

Radial paving

Paving arranged around a radial center.

06

RESPONSIVE INPUTS

Choose the right driver.

DriverSource in RevitBest forUpdate
Reference ControlMovable red Generic Model pointLocalized circular influence and direct manipulationAutomatic when enabled, or Update From Host
Reference LineMovable and rotatable VORMA line controlDirectional bands and edge-like responsesAutomatic when enabled, or Update From Host
Picked Model CurveOne Revit Model Line, Arc or SplineCustom drawn response pathsAutomatic when enabled, or Update From Host
Sun PathActive Revit sun azimuth and altitudeSolar-direction design studiesRun Update From Host after changing the study time
Tree attractorsSelected planting or tree family instancesLandscape clearance, warping and cellular transitionsEdit / Regenerate or Update From Host
07

CONTROL REFERENCE

What the main parameters mean.

Columns / Rows
Grid resolution across the selected face. More cells increase detail and Revit workload.
Gap ratio
Normalized separation between modules. Perforated screens require enough remaining material between openings.
Depth
Base extrusion measured in millimetres along the local host-face normal.
Random extra extrusion
Seeded 0-to-maximum depth variation added per stable module.
Surface offset
Distance from the host surface; negative values move toward the opposite local normal.
Density
How many candidate cells remain active in patterns that support omission or grading.
Jitter
Seeded irregularity applied by compatible pattern families.
U / V phase
Normalized directional shift of compatible gradients and pattern fields.
Wave amplitude / frequency / angle
Strength, repetition and direction of compatible Geometry wave patterns.
Random seed
A repeatability number. Identical inputs and seed reproduce the same seeded design decisions.
Chunk / batch size
How many modules are combined into optimized Revit DirectShapes when individual editing is off.
Influence radius
Physical distance over which a responsive or landscape source affects the field.
Response strength
How strongly the driver remaps values between the configured minimum and maximum.
Scale / rotation / depth / offset ranges
Near-to-far output limits evaluated through Linear, Smooth or Sharp falloff.
Pitch
Parametric rib centre-to-centre spacing in millimetres; it must be greater than rib thickness.
Slat rotation
Rotation of each rib about its longitudinal back-edge centreline, separate from layout direction.
08

OUTPUT REFERENCE

Know what each export contains.

Current arrangement DXF

Preserves the current compatible planar Revit arrangement, Marks, areas and project locations.

Master DXF

Packages numbered parts and data into consolidated sheet layouts with optional nesting.

Master SVG

Creates a vector companion for viewing and design coordination.

Parts CSV

Lists part identity, type, quantity, area, dimensions, material and location data.

Type Schedule CSV

Optional rationalized Type and quantity register based on the chosen tolerances.

Revit schedules

Optional Type Quantities and Part Register schedules created from available built-in parameters.

Slat DXF + CSV

A separate Parametric exporter for supported planar ribs; it is a flat profile catalogue without stock nesting.

Fabrication files require independent verification.

Check true 1:1 millimetre scale, every closed contour, quantity, type, material, thickness, stock break, joint, tolerance and kerf. VORMA does not replace shop drawings, CAM preparation or engineering approval.

09

SOLVE COMMON ISSUES

Troubleshooting.

The VORMA PRO ribbon is missing.

Confirm that the installer matches the installed Revit version, close and restart Revit, and check that Windows did not block the installer. If the problem remains, email support with the Revit year and Windows version.

A command asks me to select a VORMA element.

Select one surviving generated module, tile, copy or rib carrying VORMA metadata. Geometry/Landscape commands do not operate on Parametric ribs, and Parametric commands do not operate on Geometry/Landscape modules.

Update did not preserve a local edit.

Preservation requires a matching stable identity and a supported edit. Large topology changes can replace keys. Parametric preserves translations, deletions, boundary/material edits and uniform paint, but not arbitrary manual rib rotation.

Automatic Parametric update did not run.

Automatic update happens after Revit commits an edit. Check that Live update is enabled, the license is valid and elements are editable. Worksharing ownership, pinned/grouped elements or document restrictions can block regeneration; use the manual update command after resolving them.

A host or driver was deleted.

VORMA keeps the previous generated geometry rather than guessing. Select a surviving member, use Edit / Regenerate or Parametric Edit / Repick, and choose a replacement source.

A Door or Window cut is wrong.

Use Parametric Edit / Repick to select only openings hosted by the chosen wall or perimeter walls. Native wall cuts keep their actual boundary; non-cutting families use a conservative projected rectangular cut.

Fabrication export is blocked.

Resolve the message before retrying. Common causes are curved or nonparallel geometry, duplicate rib identities, externally altered geometry, missing stock materials, or horizontal perimeter rows that are not flat parts.

Where is the diagnostic log?

Open %LOCALAPPDATA%\VormaPro\VormaPro.log. Include the relevant final entries, Revit version, Windows version and a short reproduction description when contacting support.

Can I send the DXF directly to a CNC machine?

No. First verify 1:1 millimetre scale, closed contours, quantities, materials, thickness, kerf, stock, joints and fixing details with the fabricator. VORMA does not supply machine tooling or engineering approval.

My license is inactive or a computer seat is full.

Open License Center, refresh the license and deactivate an old computer when possible. If the old computer is unavailable, send the license order details and Computer ID to support@vorma.me.

10

COMPATIBILITY

Before you begin.

  • Autodesk Revit 2024, Revit 2025 using .NET 8, Revit 2026.5 or later using .NET 10, or Revit 2027 on Windows
  • An open Revit project with a suitable model face
  • A valid trial or paid VORMA PRO license for protected commands
  • Project units may vary; VORMA design and fabrication fields are entered in millimetres
VORMA SUPPORT

Still need help?

Send the Revit year, Windows version, a short reproduction description and the relevant diagnostic log entries.